InMotion V14 Pro PDF Manual


Electric Unicycle User Manual
Before using your unicycle, please read the instructions, and keep this manual for ready reference.
Original instructions
GETTING STARTED
Thank you for choosing the INMOTION electric unicycle(hereinafter referred to as the unicycle)! This unicycle is an intelligent high-tech entertainment product. When you use the unicycle, there may be situations such as falling or collision that can cause injury and other risks. To reduce possible risks and ensure the personal and property safety of yourself and others, you have the responsibility and obligation to carefully read the user manual, fully understand all the warnings and precautions listed in this manual, and ensure that you can use it correctly. To obtain the latest feature/function information
and safety guidance, please download the electronic version from the official website.
Important! Read carefully and keep for future reference.
Serial number (referred to as SN below) is a unique identifier for each product, which can be used for product warranty, maintenance, insurance claims, loss confirmation, and so on. The SN is a 16-character numeric code that can be found on
the packaging box label, the body of the product, or in the device information section of the INMOTION App. Get closer to your seller so he can refer you to an appropriate training organization.

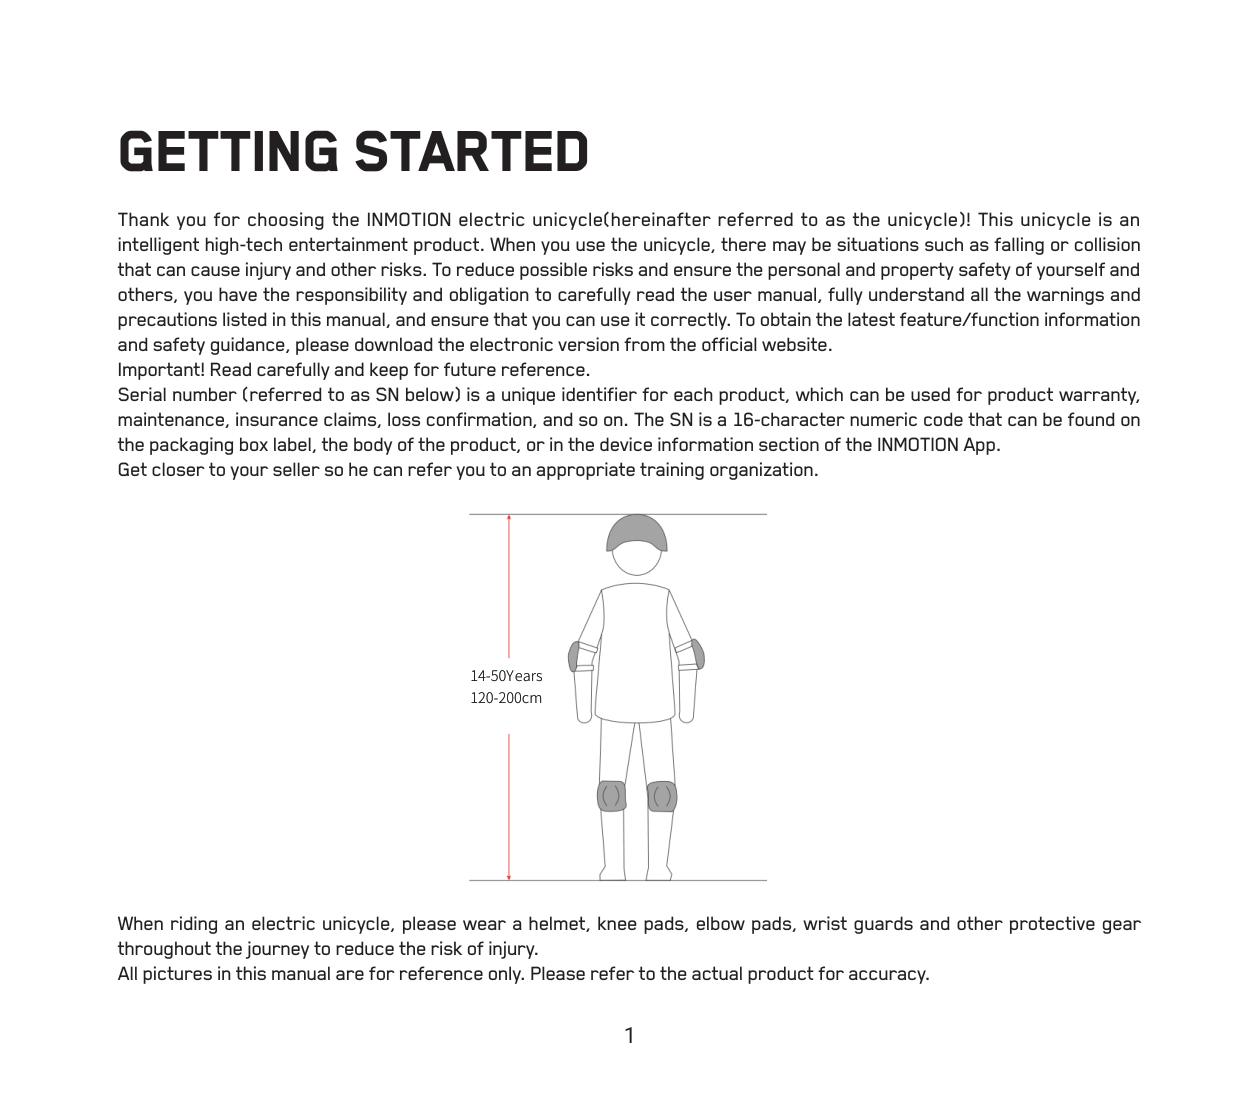
When riding an electric unicycle, please wear a helmet, knee pads, elbow pads, wrist guards and other protective gear
throughout the journey to reduce the risk of injury.
All pictures in this manual are for reference only. Please refer to the actual product for accuracy.
PACKING LIST
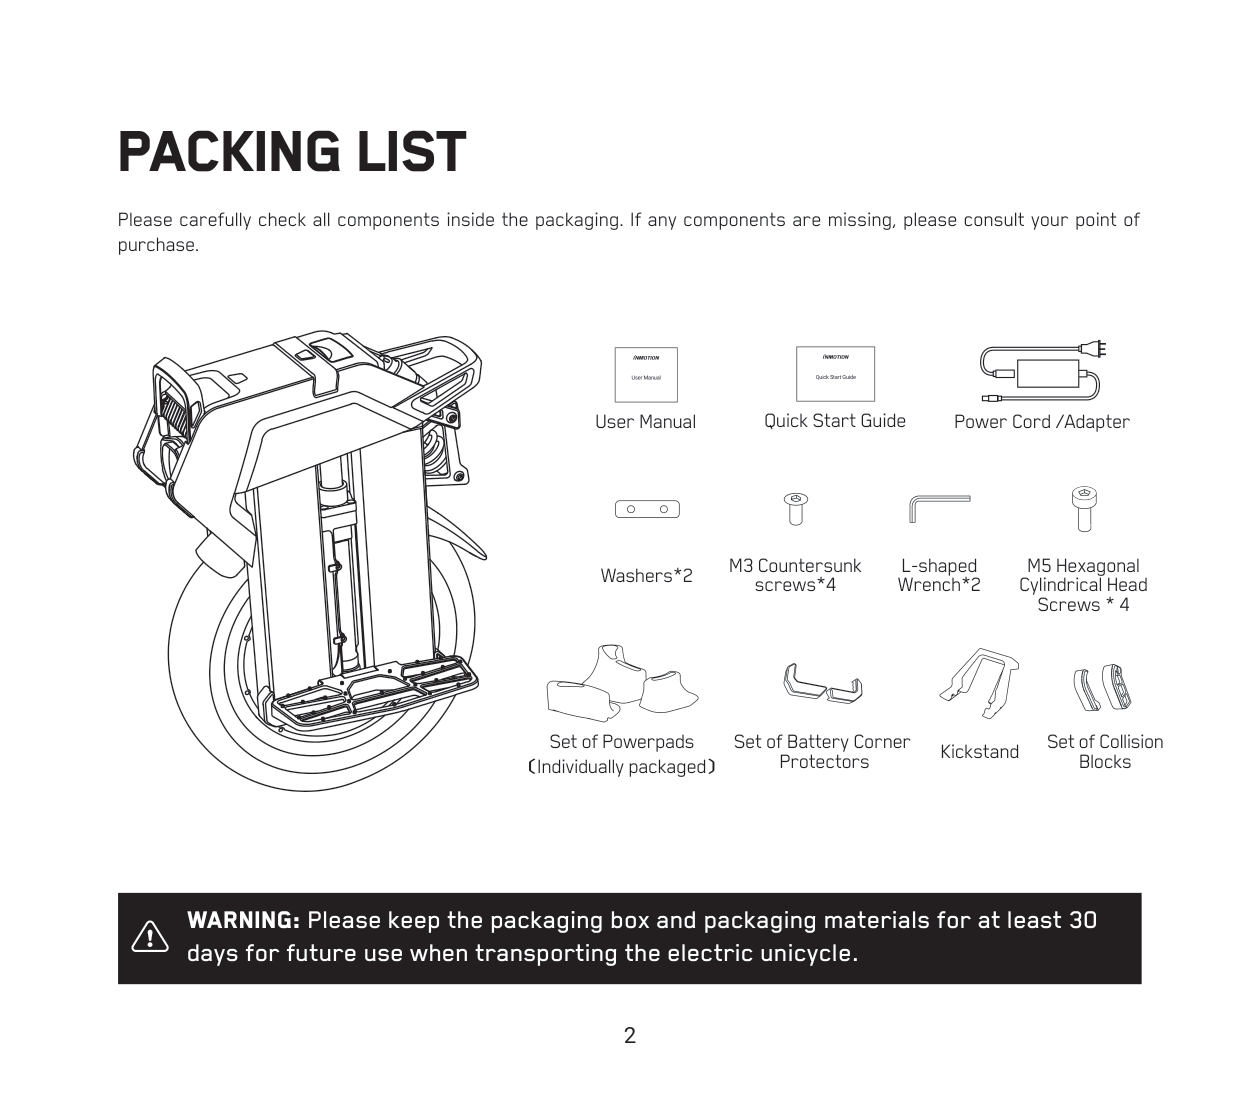
Please carefully check all components inside the packaging. If any components are missing, please consult your point of purchase.
- User Manual
- Quick Start Guide
- User Manual
- Quick Start Guide
- Washers*2
- M3 Countersunk screws*4
- Power Cord /Adapter
- L-shaped Wrench*2
- Set of Powerpads
- Set of Battery Corner Protectors
- M5 Hexagonal Cylindrical Head Screws * 4
- Kickstand
- Set of Collision Blocks
Warning: Please keep the packaging box and packaging materials for at least 30
days for future use when transporting the electric unicycle.
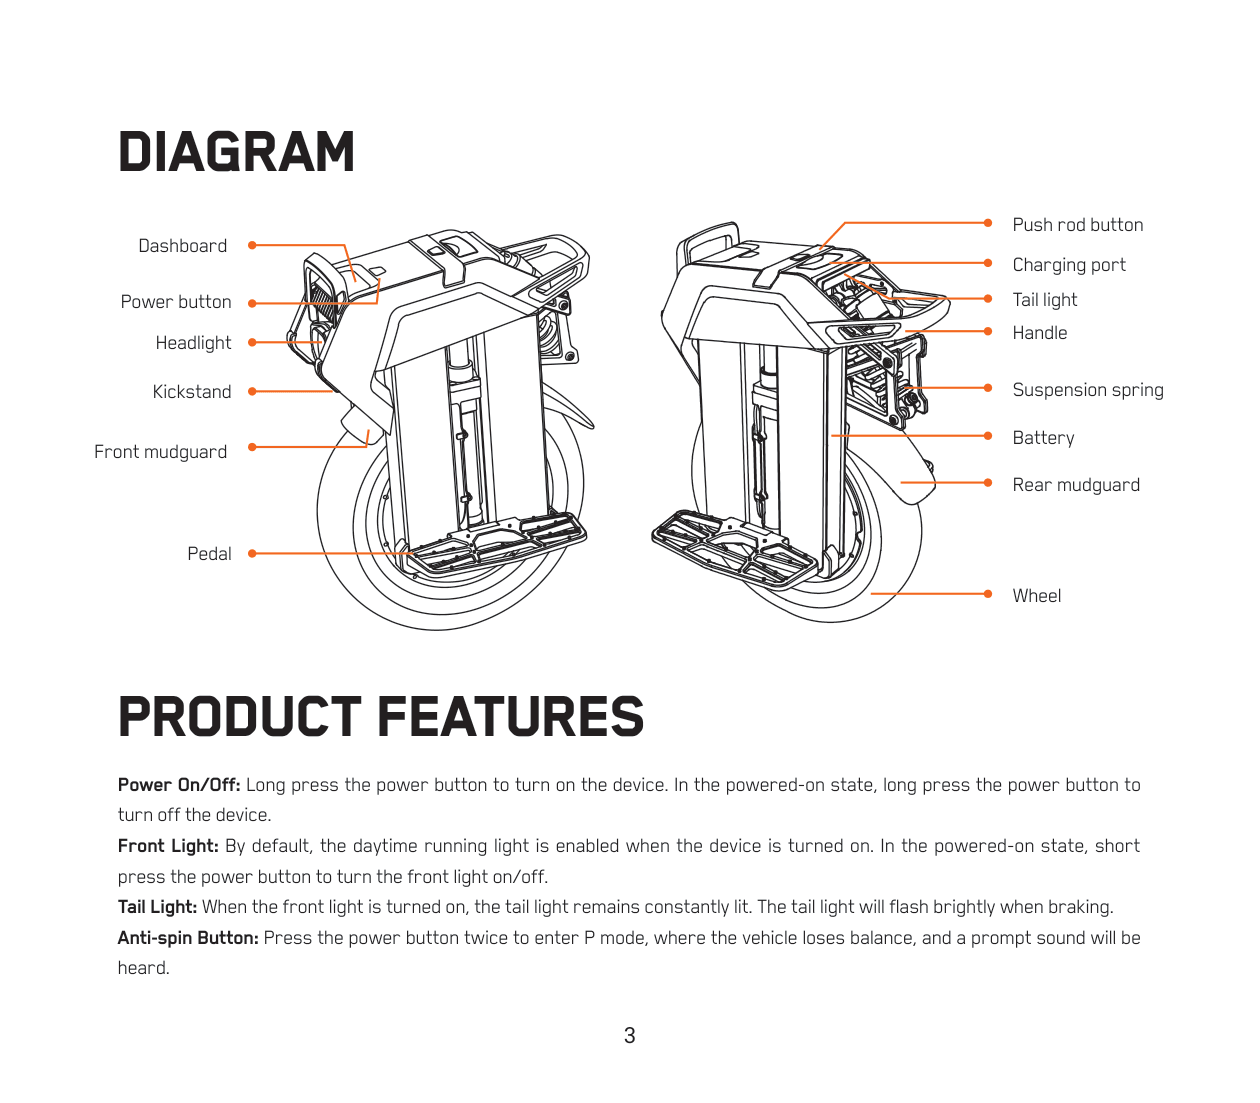
DIAGRAM

PRODUCT FEATURES
Power On/Off: Long press the power button to turn on the device. In the powered-on state, long press the power button to turn off the device.
Front Light: By default, the daytime running light is enabled when the device is turned on. In the powered-on state, short press the power button to turn the front light on/off.
Tail Light: When the front light is turned on, the tail light remains constantly lit. The tail light will flash brightly when braking.
Anti-spin Button: Press the power button twice to enter P mode, where the vehicle loses balance, and a prompt sound will be heard.
Power Assist: Enabling this mode helps you achieve a more comfortable acceleration and braking experience.
(1) Acceleration Assist: Adjust the value to achieve a more comfortable and rapid acceleration experience. A higher value results in faster acceleration.
(2) Braking Assist: Adjust the value to achieve a more comfortable and rapid braking experience. A higher value results in shorter braking distance.
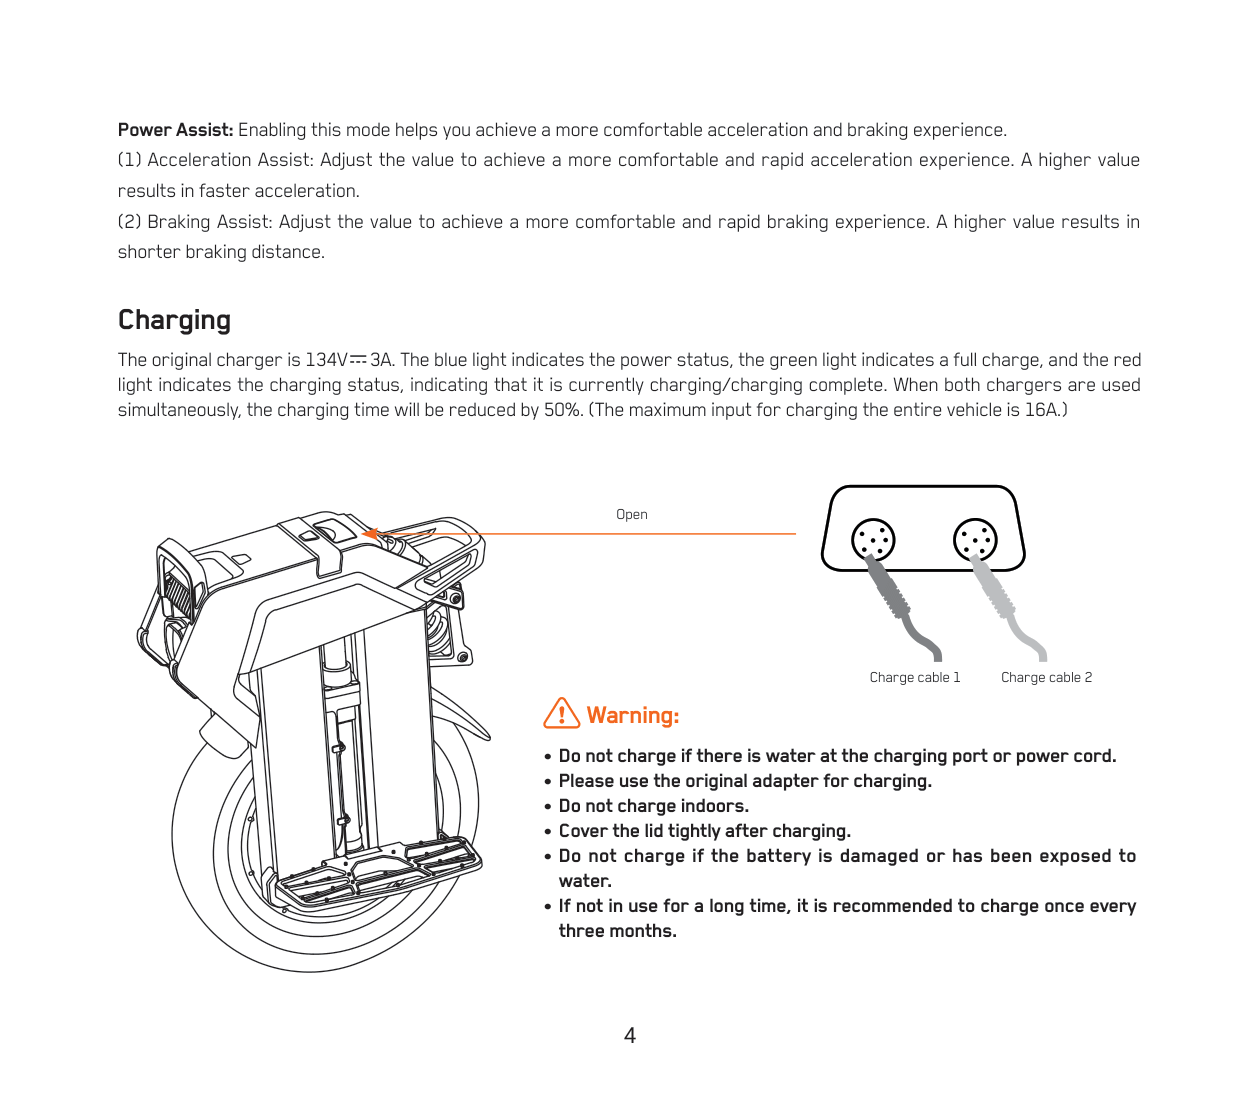
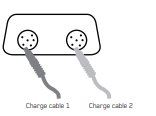
Charging
The original charger is 134V 3A. The blue light indicates the power status, the green light indicates a full charge, and the red light indicates the charging status, indicating that it is currently charging/charging complete. When both chargers are used simultaneously, the charging time will be reduced by 50%. (The maximum input for charging the entire vehicle is 16A.)
Warning:
• Do not charge if there is water at the charging port or power cord.
• Please use the original adapter for charging.
• Do not charge indoors.
• Cover the lid tightly after charging.
• Do not charge if the battery is damaged or has been exposed to water.
• If not in use for a long time, it is recommended to charge once every three months.
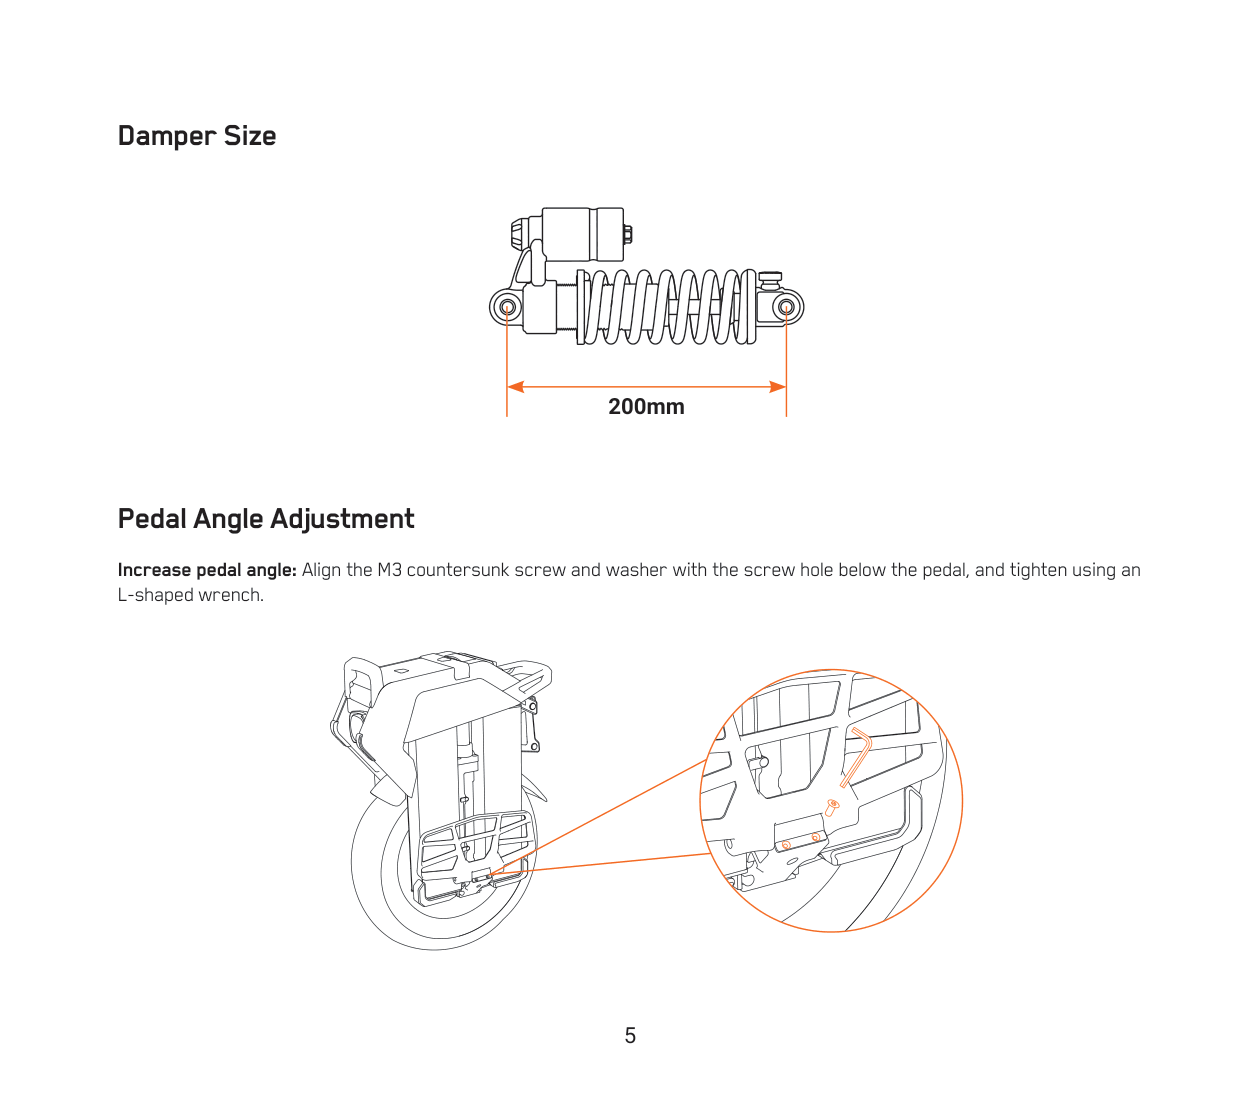
Damper Size

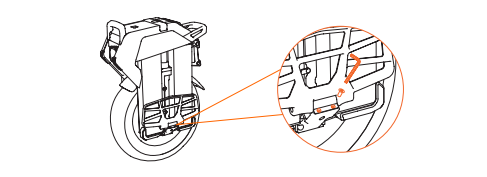
Pedal Angle Adjustment
Increase pedal angle: Align the M3 countersunk screw and washer with the screw hole below the pedal, and tighten using an L-shaped wrench.
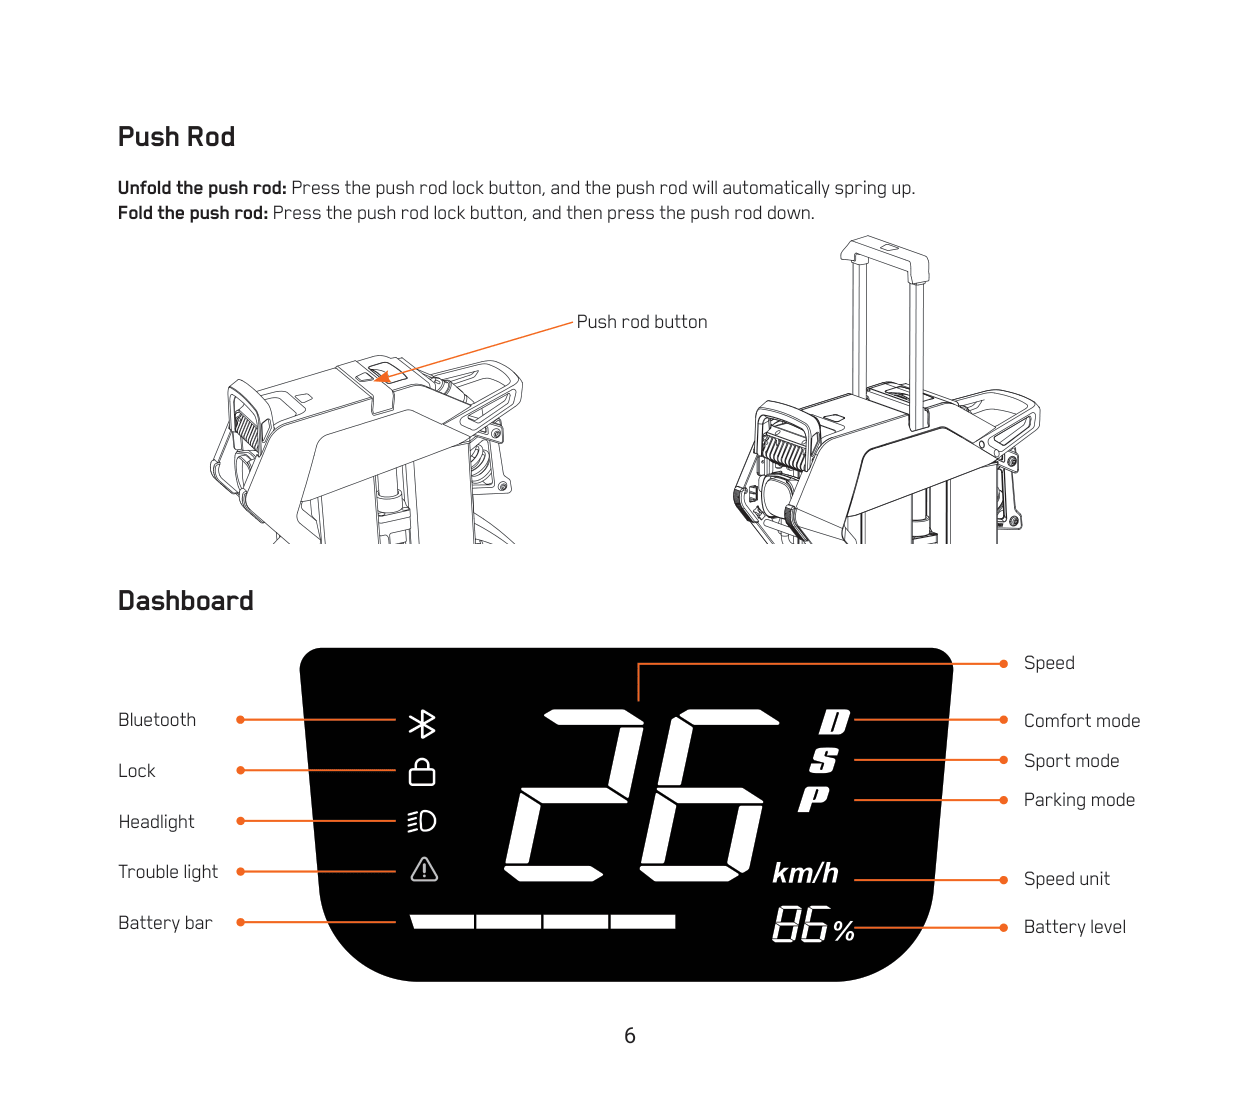
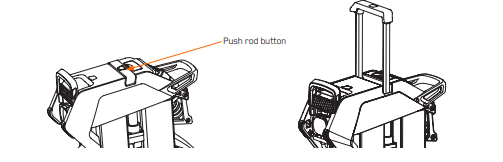
Push Rod
Unfold the push rod: Press the push rod lock button, and the push rod will automatically spring up.
Fold the push rod: Press the push rod lock button, and then press the push rod down.
Dashboard
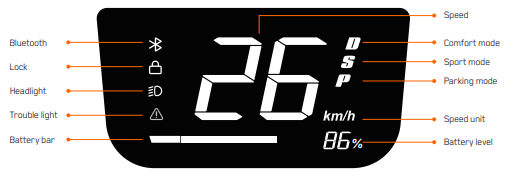
Speed Unit: Switch the display unit in the app.
Battery Level: The battery indicator and the numerical display directly show the current battery level of the vehicle.
Gear: Switch between D/S modes in the app.
(1) D: Comfort mode
(2) S: Sport mode
(3) P: Parking mode. Double-click the power button at startup to enter P mode.
Lock: Authenticated App accounts can lock the vehicle through the App.
Bluetooth: The Bluetooth icon lights up when connected.
Fault Icon: The fault icon lights up when there is a vehicle malfunction. Detailed fault information can be viewed by connecting to the app.
Headlight Icon: The headlight icon lights up when the headlights are turned on.
DIAGRAM
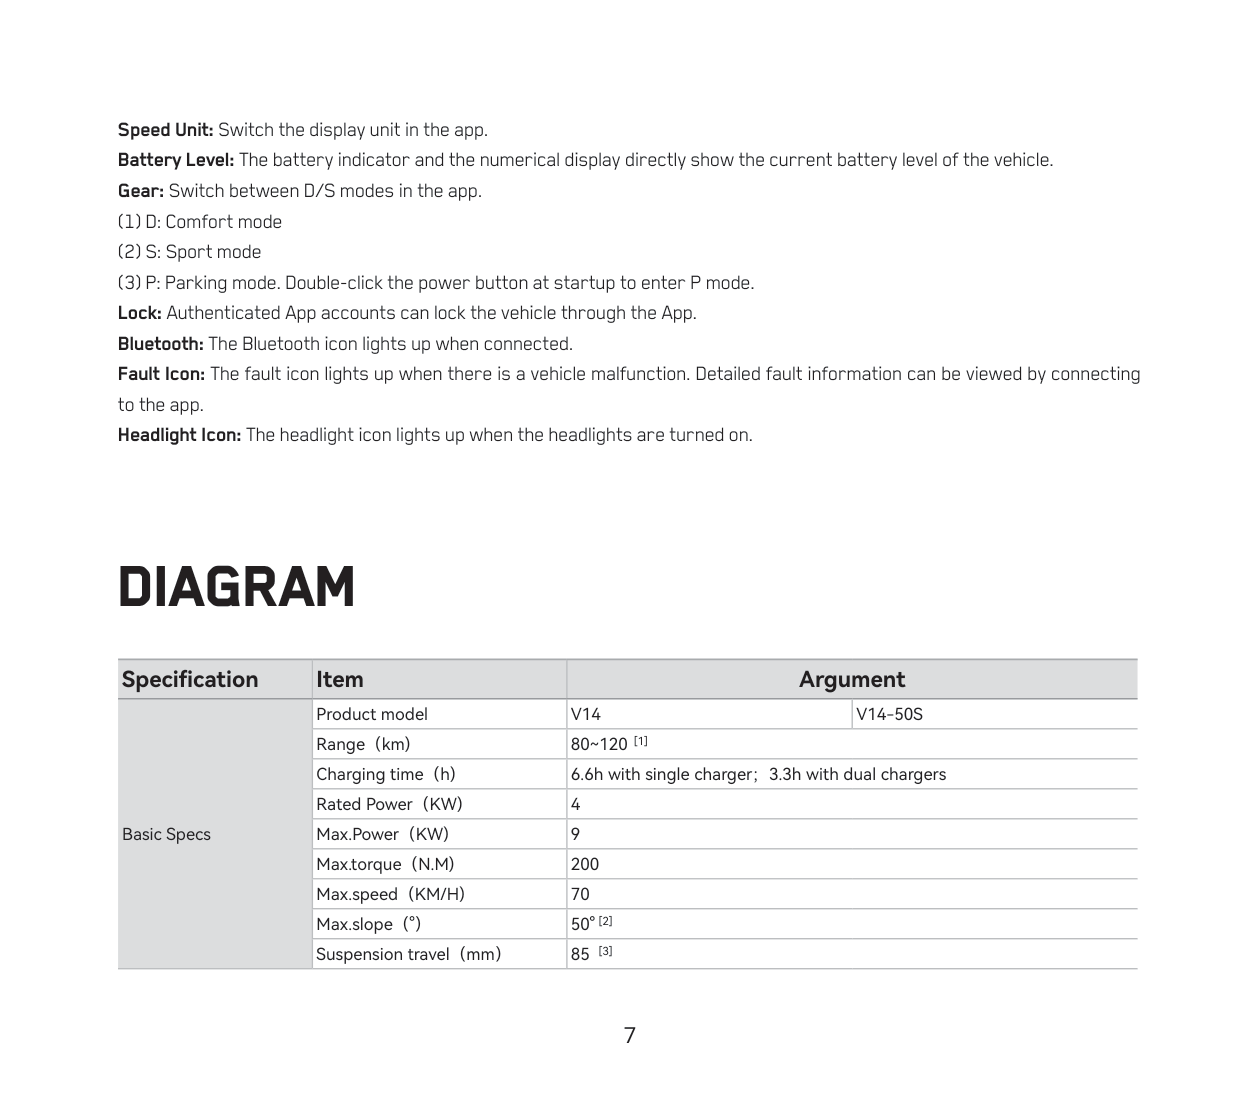
| Specification | Item | Argument |
| Basic Specs | Product model | V14 / V14-50S |
|
|
Range(km) | 80~120 [1] |
|
|
Charging time(h) | 6.6h with single charger;3.3h with dual chargers |
|
|
Rated Power(KW) | 4 |
|
|
Max.Power(KW) | 9 |
|
|
Max.torque(N.M) | 200 |
|
|
Max.speed(KM/H) | 70 |
|
|
Max.slope(°) | 50° [2] |
|
|
Suspension travel(mm) | 85 [3] |
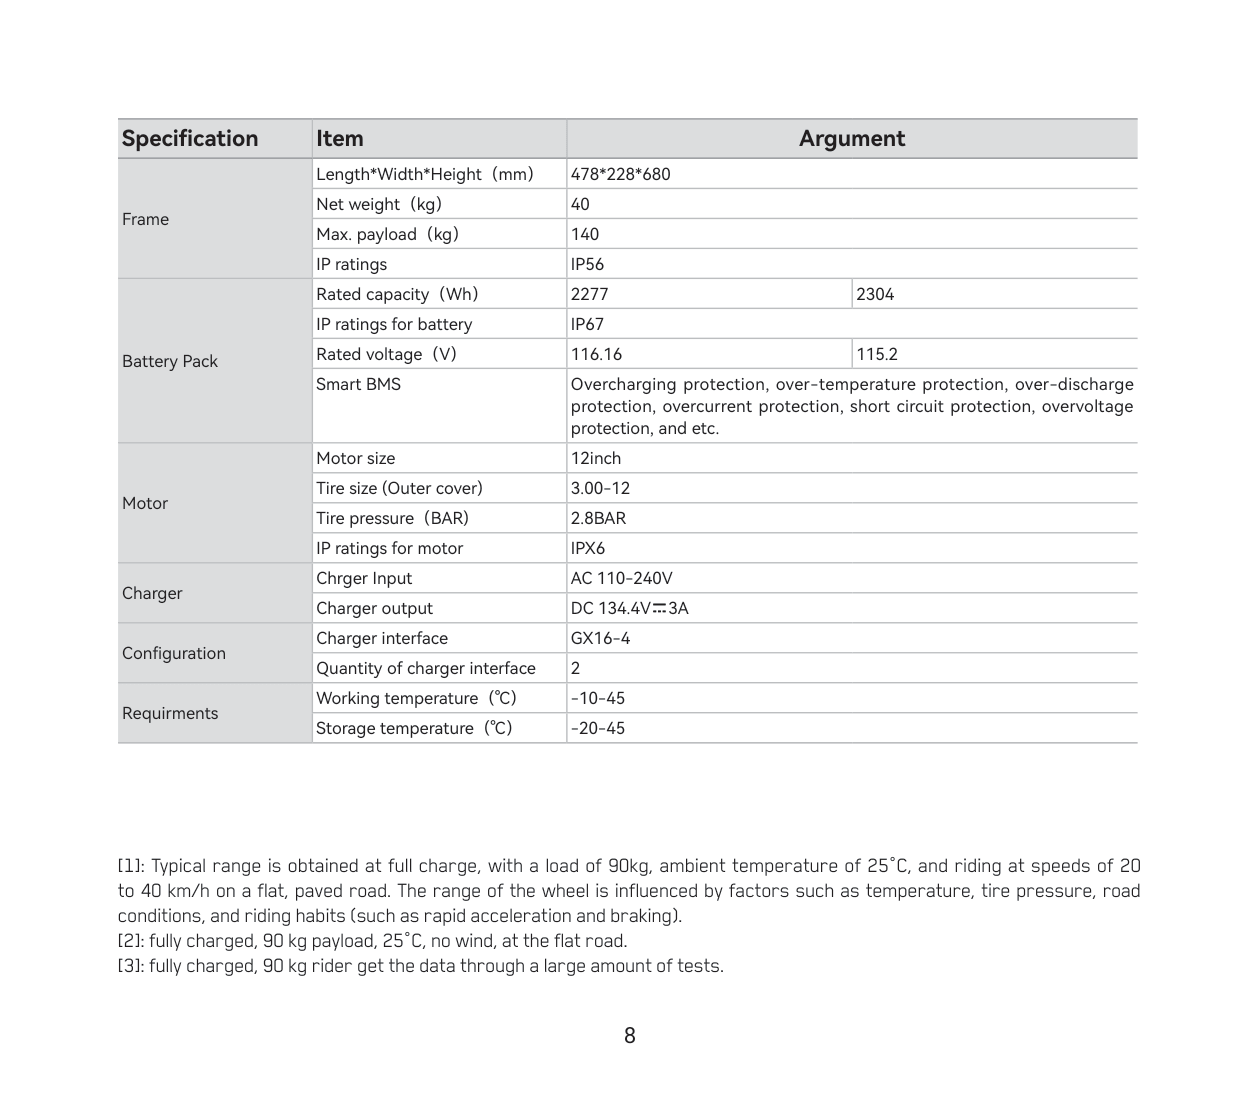
| Specification | Item | Argument |
| Frame | Length*Width*Height(mm) | 478*228*680 |
| Frame | Net weight(kg) | 40 |
| Frame | Max. payload(kg) | 140 |
| Frame | IP ratings | IP56 |
| Battery Pack | Rated capacity(Wh) | 2277 / 2304 |
| Battery Pack | IP ratings for battery | IP67 |
| Battery Pack | Rated voltage(V) | 116.16 / 115.2 |
| Battery Pack | Smart BMS |
Overcharging protection, over-temperature protection, over-discharge protection, overcurrent protection, short circuit protection, overvoltage protection, and etc. |
| Motor | Motor size | 12inch |
| Motor | Tire size (Outer cover) | 3.00-12 |
| Motor | Tire pressure(BAR) | 2.8BAR |
| Motor | IP ratings for motor | IPX6 |
| Charger | Charger Input | AC 110-240V |
| Charger | Charger output | DC 134.4V=3A |
| Configuration | Charger interface | GX16-4 |
| Configuration | Quantity of charger interface | 2 |
| Requirements | Working temperature(℃) | -10-45 |
| Requirements | Storage temperature(℃) | -20-45 |
[1]: Typical range is obtained at full charge, with a load of 90kg, ambient temperature of 25°C, and riding at speeds of 20 to 40 km/h on a flat, paved road. The range of the wheel is influenced by factors such as temperature, tire pressure, road conditions, and riding habits (such as rapid acceleration and braking).
[2]: fully charged, 90 kg payload, 25°C, no wind, at the flat road.
[3]: fully charged, 90 kg rider get the data through a large amount of tests.
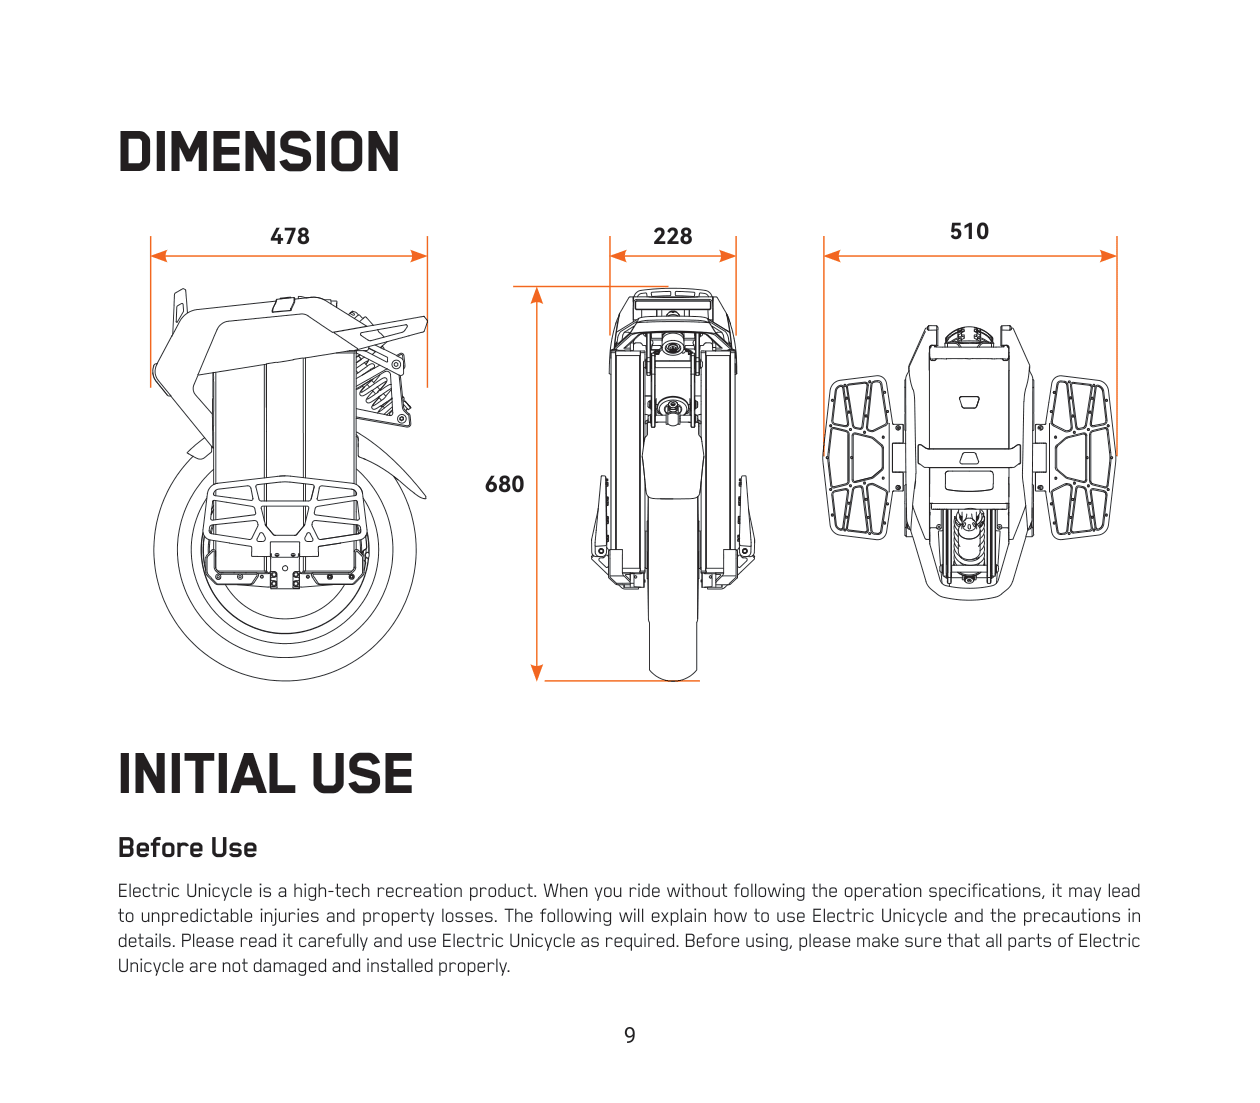
DIMENSION
INITIAL USE
Before Use
Electric Unicycle is a high-tech recreation product. When you ride without following the operation specifications, it may lead to unpredictable injuries and property losses. The following will explain how to use Electric Unicycle and the precautions in details. Please read it carefully and use Electric Unicycle as required. Before using, please make sure that all parts of Electric Unicycle are not damaged and installed properly.
Warning:
• Before using the Electric Unicycle, ensure that the battery is fully charged. It is recommended to charge it more than 80 percent of capacity.
• Find a relatively open and flat area to practice riding, (at least 4m by 4m in area), both inside and outside. You need to be fully aware of the riding environment around you to ensure that you are not disturbed by obstacles such as cars, pedestrians, pets, bicycles, etc.
• You need a skilled assistant stood by. The assistant must be familiar with Electric Unicycle and all precautions and usage methods in this manual.
• Please do not ride the vehicle on slippery ground.
• Users are advised to wear comfortable, casual or sports clothing, and to wear flats and warm up to improve your flexibility.
• Be sure to wear a helmet and riding protective gear to avoid injury.
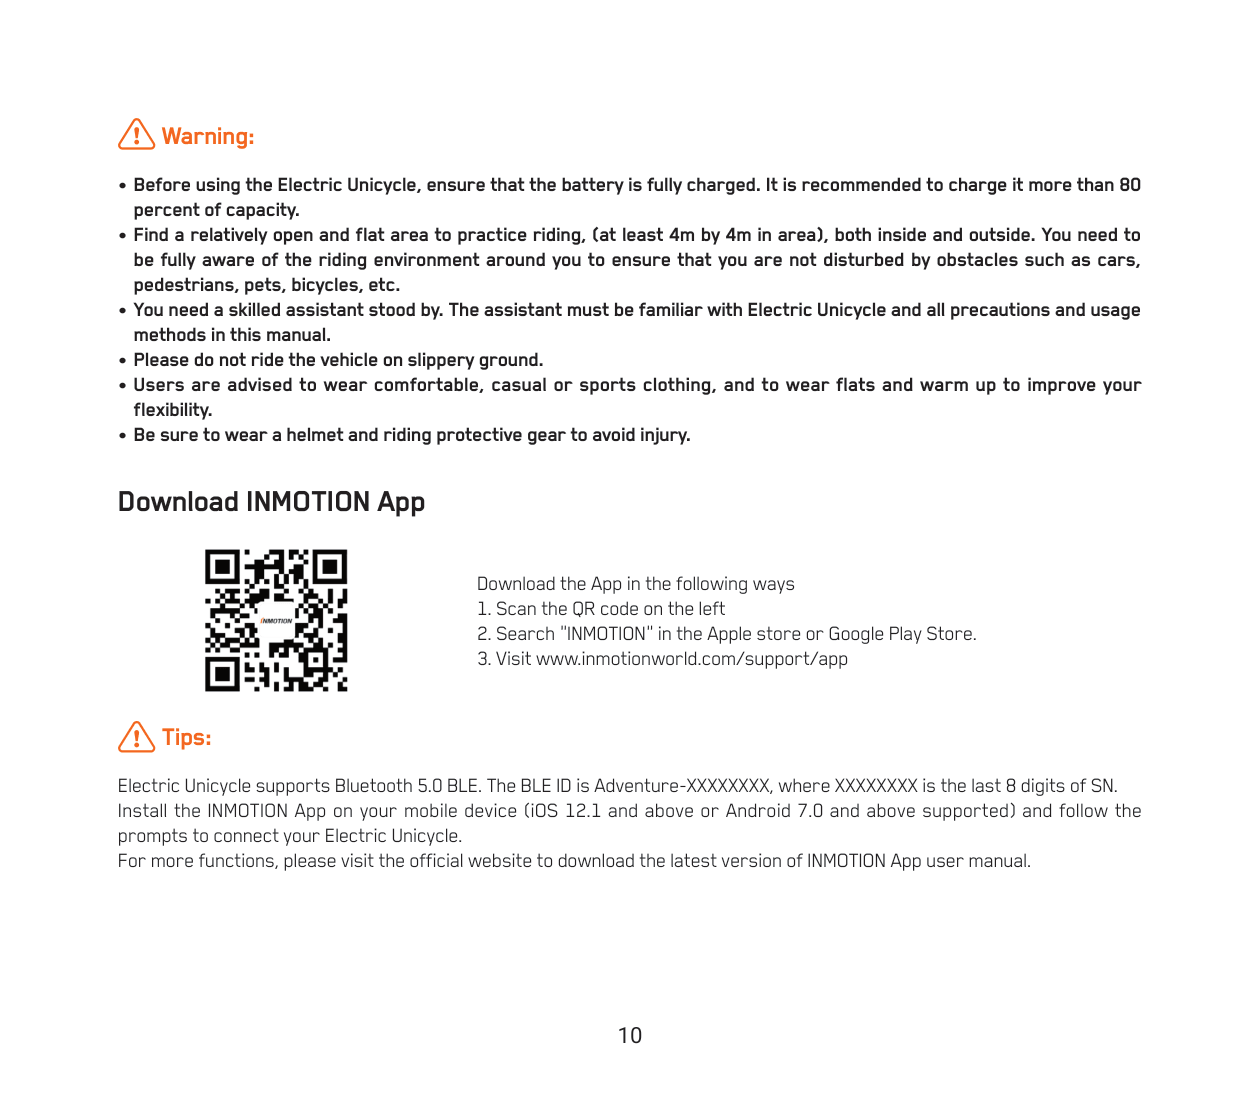
Download INMOTION App
Download the App in the following ways
- Scan the QR code on the left
- Search "INMOTION" in the Apple store or Google Play Store.
- Visit www.inmotionworld.com/support/app
Tips:
Electric Unicycle supports Bluetooth 5.0 BLE. The BLE ID is Adventure-XXXXXXXX, where XXXXXXXX is the last 8 digits of SN. Install the INMOTION App on your mobile device (iOS 12.1 and above or Android 7.0 and above supported) and follow the prompts to connect your Electric Unicycle.
For more functions, please visit the official website to download the latest version of INMOTION App user manual.
LEARNING TO RIDE
- Step on the pedal with one foot, then swing back and forth.
- Step on the pedal with one foot, keep your feet and body upright and gradually shift your weight up.
- Step on the pedal with one foot, lift the other foot off the ground for 1-2 seconds and start gliding.
- Step on the pedal with one foot, push back with the other foot and start gliding.
- Step on pedals with both feet, use your weight to move forward and back.
- Press the pedals with feet by different force to make a turn.